How to Edit A Picture
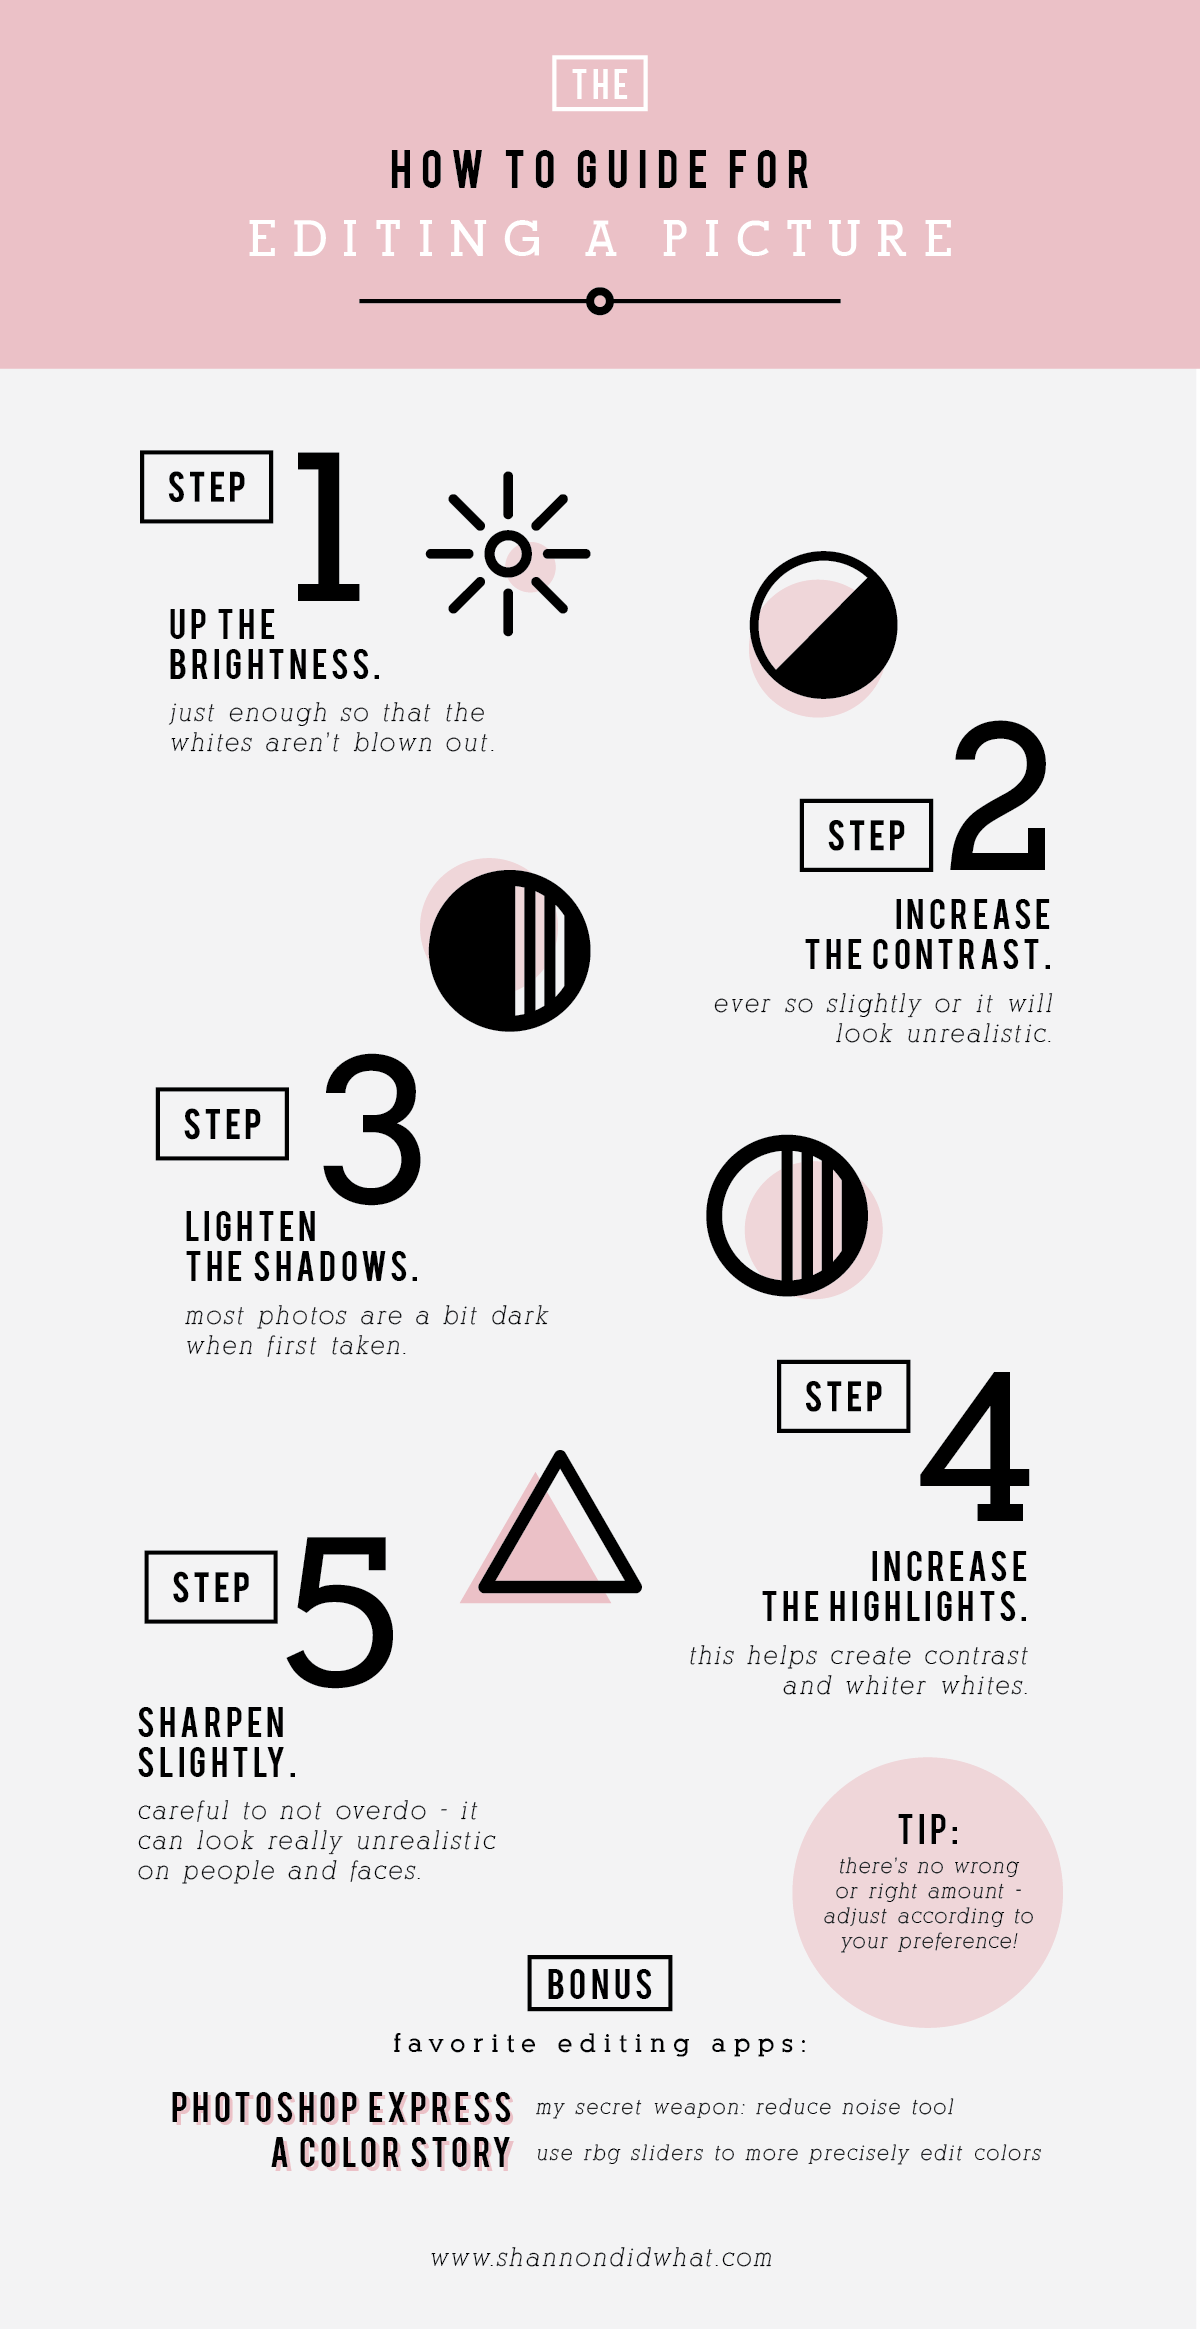
I think the graphic pretty much explains the main things I do when prepping a picture to post on any of my social media accounts. I feel like I get asked all the time how I edit my photos, so for all of you that ever asked me, here it is! These 5 steps are very easily done in the Instagram app itself. It really varies for me from picture to picture if I will just use Instagram or pull the picture into another app.
There are two main reasons why I would use another app: the photo is pixelated/fuzzy or the color balance needs help. Photoshop Express is my favorite. Maybe its because I use Photoshop all day, every day at work so I'm really comfortable using it, but the express app version is pretty simple to use. Since I have a subscription to the cloud service, I just log in and can use my favorite and secret weapon: the reduce noise tool. You, too, can use it, you can just purchase it. I would. If you do use it, use the reduce noise tool slightly, then sharpen slightly, but I would go back and forth. If you just use the reduce noise without sharpening it could look a little weird.
My second favorite photo editing app is called A Color Story. It really is the best when it comes to color. This app specializes in brightening the whites and making colors more saturated. Of course, there are tons of filters you can use (and buy). These filters are really some of the better ones I've seen. They're not your typical Instagram filters. Or if you understand RGB, you'll have no problem using the sliders in the tools section. I love that if my picture is a little to red or blue, I can easily balance the color through this app. In other apps, the colors aren't broken down as much as in A Color Story. If you aren't familiar with RGB sliders, don't fret, I think it's really fun to just play around with them until you get a result you're happy with.
Hope you got some helpful tips from my fun little graphic!
Yours Truly // Shannon